Kategorien
Agavi Frameworks Javascript PHP

agavi output type overwrite in action

um den output type einer agavi action auch nach dem routing zu ändern, kann man innerhalb der action den output type überschreiben.


/**
 * assume that 'html' is the standard GET output for this action
 * when this action is called via POST you want to change the output type to 'json'
 * because on error or success you want to show small messages per json instead full html
 */
    public function executeRead(AgaviRequestDataHolder $rd)
    {
        return 'Input';
    }

    public function executeWrite(AgaviRequestDataHolder $rd)
    {
        $this->getContainer()->setOutputType($this->getContext()->getController()->getOutputType('json'));
        try
        {
            // do POST stuff
        }
        catch(Exception $e)
        {
            $this->setAttribute('message', $e->getMessage());
            return 'Error';
        }
        return 'Success';
    }
Kategorien
Agavi Debugging Frameworks Linux PHP Shell XML

Agavi Custom Logger implementieren

Um in Agavi custom logfiles zu erstellen, benötigt man einen eigens erstellten logger + appender in der app/config/logger.xml.

<!-- logs only custom messages in a custom log -->
<logger name="custom" class="AgaviLogger" level="'custom'">
    <appenders>
        <appender>CustomLogAppender</appender>
    </appenders>
</logger>

<appender name="CustomLogAppender" class="AgaviFileLoggerAppender" layout="DateTimeLayout">
    <ae:parameters>
        <ae:parameter name="file">%core.app_dir%/log/custom.log</ae:parameter>
    </ae:parameters>
</appender>

Dann kann man den Logger quasi überall wo der LoggerManager verfügbar ist benutzen.

$message = 'Custom logging message';
$this->getContext()->getLoggerManager()->log(new AgaviLoggerMessage($message, 'custom'), 'custom');

Und in der bash das logfile einsehen.

tail -f app/log/custom.log
Kategorien
Agavi Frameworks XML

Agavi routing specials

Um bestimmte Agavi output_types bei speziellen routings zu bedienen kann man die routing.xml wie folgt anpassen.

<!-- cut out leading slash -->
<route name="slasher" pattern="^/" stop="false" imply="true" cut="true" />

<!-- match ajax calls with special http header -->
<route pattern="XMLHttpRequest" source="_SERVER[HTTP_X_REQUESTED_WITH]" stop="false" output_type="ajax" />

<!-- match json calls with special http header -->
<route pattern="application/json" source="_SERVER[HTTP_ACCEPT]" stop="false" output_type="json" />

<!-- cut out special pointer -->
<route name="portal" pattern="^({portal:[a-zA-Z]{3}}/)?" stop="false" imply="true" cut="true">
    <callbacks>
        <callback class="RoutingCallback" />
    </callbacks>
</route>
Kategorien
Agavi Frameworks PHP XML

Eigene Configs in Agavi nutzen

Für diverse Aufgaben in größeren Projekten ist es notwendig, eigene XML-Konfigurationsdateien zu nutzen. Die Definition umfangreicher Einstellungen in der settings.xml wird schnell anstrengend und das Holen der Werte per AgaviConfig::get('setting.name', 'default'); unübersichtlich. Agavi bietet es aber an, eigene Konfigurationsdateien zu erstellen und diese nicht nur zu validieren, sondern auch zur Wiederverwendung zu cachen.
In der Agavi FAQ habe ich dazu mal ein Beispiel verfasst.

Einfach einen Config-Handler in der config_handlers.xml definieren:

<handler pattern="%core.config_dir%/project/foo/*.xml" class="AgaviReturnArrayConfigHandler" />

und dann direkt in den Actions, Views und Models benutzen:

if (!isset($config['baz']))
{
    throw new LogicException('baz is missing!');
}

if (isset($config['bars']))
{
    foreach ($config['bars'] as $foo => $data)
    {
        $this->doSomethingWithEach($foo, $data);
    }
}

Die XML-Datei für den obigen Code könnte beispielweise so aussehen:

<ae:configurations>
    <ae:configuration>
        <baz>asdf</baz>
        <foo>-1</foo>
        <bars>
            <some>...more data and xml...</some>
            <more>...more data and xml...</more>
            <deep>...more data and xml...</deep>
            <structs>...more data and xml...</structs>
        </bars>
    </ae:configuration>
    <ae:configuration environment="production.*">
        <baz>bleh</baz>
        <foo>1</foo>
    </ae:configuration>
</ae:configurations>

Gut zu erkennen ist der Vorteil eigener Configs: Man kann die Agavi-Features für Konfigurationsdateien nutzen und auf einfache Art und Weise environmentspezifische Einstellungen vornehmen (z.B. in „Production“ andere Werte für Logdateien, URLs oder Einstellungen nutzen als während der Entwicklung oder beim Testen).

Ebenfalls gut zu erkennen im PHP-Code ist, dass man lauter Abfragen über die Existenz bestimmer Elemente macht, die man sich mit vernünftiger Validierung sparen kann, da invalide XML-Dokumente gar nicht erst als korrekt angesehen werden von Agavi. Um seine XML-Strukturen zu validieren definiert man per validation Parameter ein XML-Schema und definiert noch gleich einen eigenen ConfigHandler, den man schreibt und per autoload.xml bekannt macht:

<handler pattern="%core.config_dir%/project/foo/*.foo.xml" class="FooDefinitionConfigHandler">
    <validation>%core.config_dir%/xsd/foo_definition.xsd</validation/>
</handler>

Der ConfigHandler könnte so beginnen:

class FooDefinitionConfigHandler extends AgaviXmlConfigHandler
{
    // notwendige Methoden implementieren und XML-Struktur validieren...
}

Für Beispiele einfach in die in Agavi verwendeten XSDs und entsprechende ConfigHandler sehen. Viel Spaß. :)
Kategorien
Agavi Frameworks

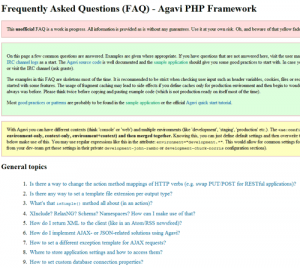
die inoffizielle Agavi FAQ

inoffizielle Agavi FAQ

Allen die immernoch sehnsüchtig auf eine offizielle Agavi Doku warten, sei hier die inoffizielle FAQ Variante von mivesto ans Herz gelegt.

mivesto.de/agavi/agavi-faq

Kategorien
Agavi Apache Frameworks

Agavi auf XAMPP und Windows

Nachdem ich das offizielle Agavi DOC durchforstet habe und keine Lösung für meine Testumgebung fand, stieß ich auf diesen Link hier:

simonholywell.com/article/installing-agavi-on-xampp-windows

Herr Holywell selbst hat eine prima Einführung in die Installation von Agavi auf XAMPP und Windows geliefert.

Hier der Post im Original:

Having recently heard of the Agavi project from a web framework showdown at a PHP conference in the UK I have decided to trial it. My setup is a WinXP computer with a default install of the latest XAMPP which has thrown up some issues with installing and building Agavi. Please see my hints below to overcome these issues.

1. Open a command prompt (type cmd in the run console)
2. Navigate to your XAMMP PHP directory. Mine is C:\xampp-test\php
3. Execute pear.bat channel-discover pear.agavi.org
4. Execute pear.bat install agavi/agavi

Agavi is now installed! Now we just need a new default project to work from.

Agavi needs to be told where the phing batch file is stored.

1. Edit the agavi.bat file in the XAMPP php directory. Mine is C:\xampp-test\php\agavi.bat
2. Change set PHING_COMMAND=phing to contain the full absolute path to phing.bat which is in the XAMPP php folder. Mine looks like this: set PHING_COMMAND=C:\xampp-test\php\phing.bat

Begin setting up your project directory.

1. Create a new directory in your XAMPP directory. Mine is C:xampp-testhtdocssimonholywell.com
2. Create an empty text file called build.properties in the directory (this banishes a build error where phing fails if it cannot find the file)
3. Open a command prompt and navigate to the new directory
4. Execute agavi.bat project The agavi.bat file is stored in the XAMPP php folder. My command looked like this: C:\xampp-test\php\agavi.bat project
5. Follow the prompts the installer gives you (hitting enter will supply the installer with the [default] value)

Agavi should now be setup for your project. View it in your browser to verify.